DW Timeline: Customize Section
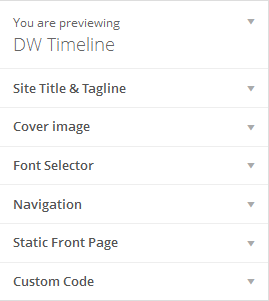
DW Timeline will let you tweak the theme such as the logo, tagline, header image in a more intuitive way and you can see the results in real-time without opening or refreshing your site. DW Timeline has five built-in options for customize section:
- Site Title & Tagline: Set the title and a short description for the theme.
- Cover Image: Add a new header image, change the background color.
- Font Selector: Pick font.
- Navigation: Activate any custom menus you want to display in front-end.
- Static Front Page: Select what will appear on your blog home page.
- Custom Code: Add custom code.
To use Customize section, go to Appearance >> Customize in your admin panel.
Setting Site Title & Favicon
To display the site title, favicon and “Get Started” button, please follow our instruction below:
- Navigate to Admin Panel > Appearance >> Customize >> Site title & Tagline. Enter your site title and tagline as you want.
- Also, you can change text in “Get Started” button and upload a favicon image as you want.

Header Settings
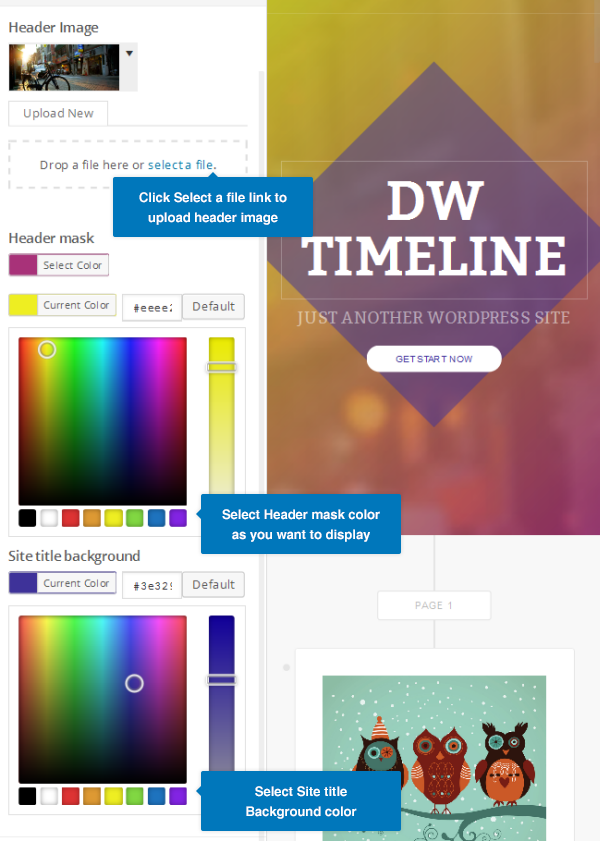
DW Timeline allows users to upload their very own custom header image to obtain a much more personalized look and feel. Just go to Appearance >> Customize >> Cover Image and you’ll be able to choose Header Image, Header mask and Site Title Background color. Once done, hit the Save & Publish button at the top right to apply changes.
Menu Settings
Step 1 Before adding an item to a menu, you need to define a menu.
- Go to Admin panel >> Appearance >> Menus
- Select Create a new menu at the top of the page
- Enter a name for your new menu in the Menu Name box
- Click the Create Menu button.

Step 2 Add Items to menu
After defining a new menu, you need to add items to the menu. You can add pages, categories and custom links… to menu.
- Firstly, locate the items you want to add to menu by clicking the checkbox next to each item.
- Then hit the ” Add to Menu” button and click the “Save Menu” button to save all settings.
For example: To add the categories to the menu, you go to the pane titled Categories, then click on ” View All” link, select the categories you want to add the menu by clicking the checkbox next to each Category’s title.

Step 3 Add your menu to your site
After creating your first menu, there are two new options which appear to control the following:
- Auto add pages – If selected, new pages to be added automatically after creating them.
- Theme locations – Allows you to decide where you want your menu to display in your theme. By default, the main navigation area of your theme should be selected.


Here’s what it looks like:

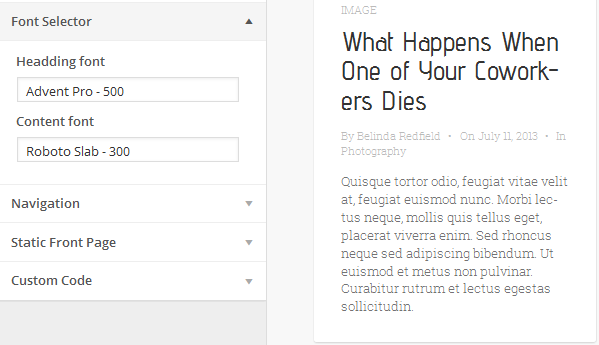
Font Selector
This section will let you pick the favorite font for your theme as you prefer. Just navigate to Customize >> Font Selector and select the font.