DW Jason: Shop Page
DW Jason supports a e-commerce plugin named WooCommerce. Follow the steps below to have a shop page like our demo.
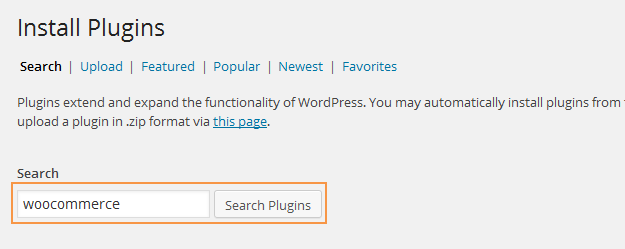
1. Install Woocommerce plugin.
Just navigate to Dashboard >> Plugins >> Add New, under Search, type “WooCommerce”
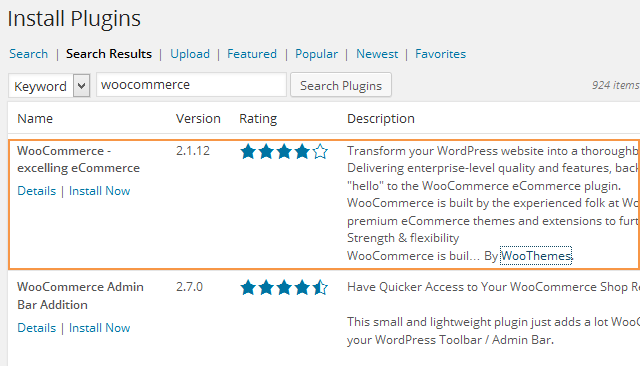
You will see a bunch of listing, make sure that you picked correct plugin as in the screenshot below:
Once the plugin is installed successfully, you will need to activate it.
2. Create Pages for Shop
Go to Dashboard >> Pages >> Add New, you need to add 3 pages below for Shop.
– Shop page
– Cart Page
– Checkout page
These pages should be created so that Woocommerce can present your products and send users to checkout.

Note: Regarding Cart and Checkout page, you add the following shortcode in order to that these pages show properly as on our demo site.
– Add the short-code below to Cart page
[woocommerce_cart]
– Add the short-code below to Checkout page:
[woocommerce_checkout]
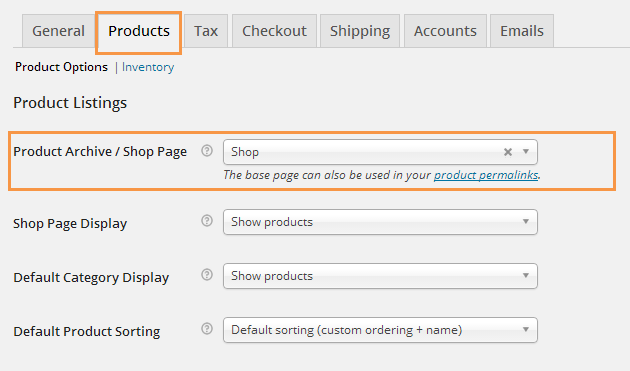
3. Setting For Product Pages
To configure your shop, go to WooCommerce > Settings.
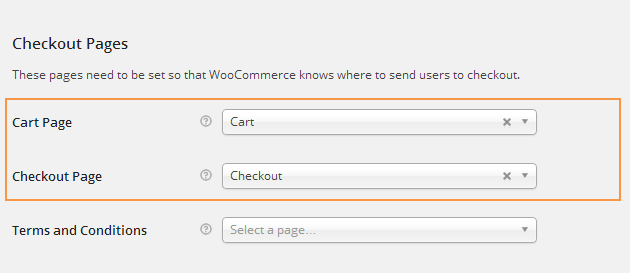
Here you will set Shop page, Cart and Checkout page.
Navigate to “Products” tab, under Product Archive/Shop page, select Shop.
Then, go to Checkout tab to assign Cart and Checkout page as illustrated below:
For more information about setting options, let’s take a look at here.
4. Add New Products
Navigate to Dashboard >> Products >> Add New:
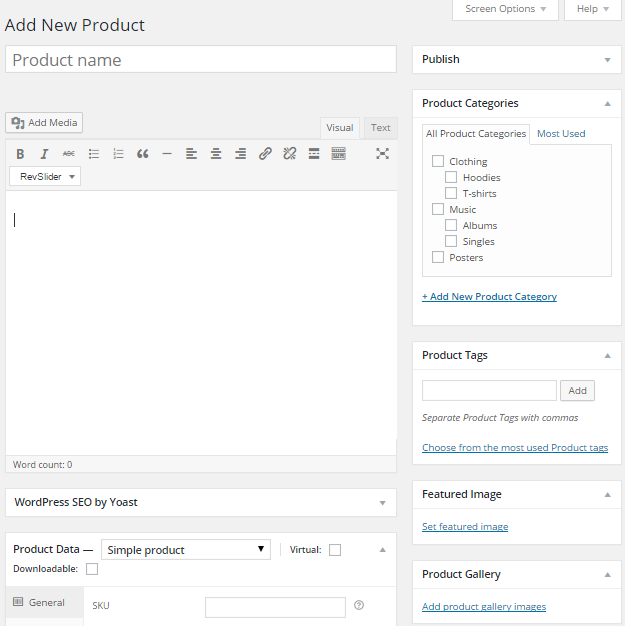
You will be presented with a new product page. Here you add title and content as required. To have a closer view, you can read documentation here.
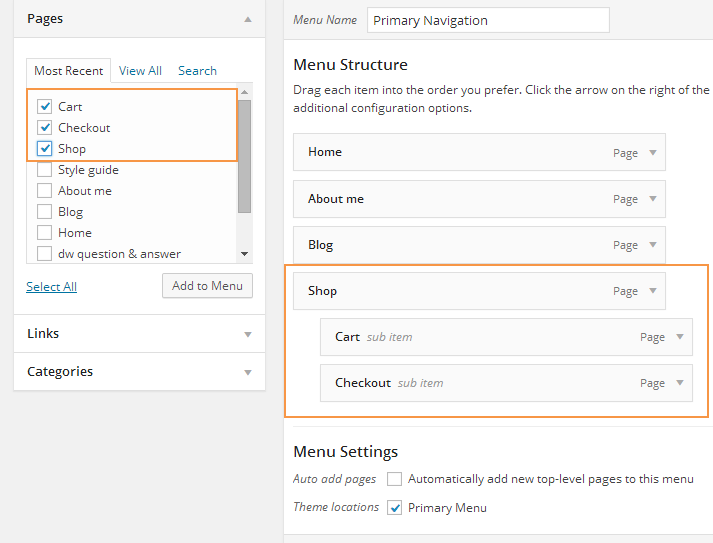
5. Add the Pages to Menu
Go to Appearance >> Menus, find pane titled Pages, add Shop, Cart, Checkout pages to menu as in the screenshot below: